Appearance
Set up your first track
A track is a guided-selection path — the set of questions a visitor answers and the logic that turns those answers into a right-sized NanaWall recommendation. This walkthrough takes you from opening the admin for the first time to a published track a buyer can use live.
It assumes no prior knowledge. Follow the numbered steps in order; each one shows the screen you'll be looking at.
Before you start
- A local environment running. The quickest way is
dev-up(or/dev-upin a Claude Code session), which migrates, seeds, and starts the server. See the README if you'd rather run thepnpmcommands yourself. - That's it — locally the admin signs you in automatically as a seeded superuser (you'll see a dev bypass badge), so there's nothing to log into.
Where "live" is
Locally the app runs at http://localhost:6650. In production the admin is gated by Cloudflare Access — see admin access for how sign-in works once it's deployed.
1. Open the admin and get oriented
Go to http://localhost:6650/admin. You land on the Dashboard: a count of everything in the knowledge base, anything needing attention (tracks with coverage gaps, unpublished drafts), and a recent-activity feed.
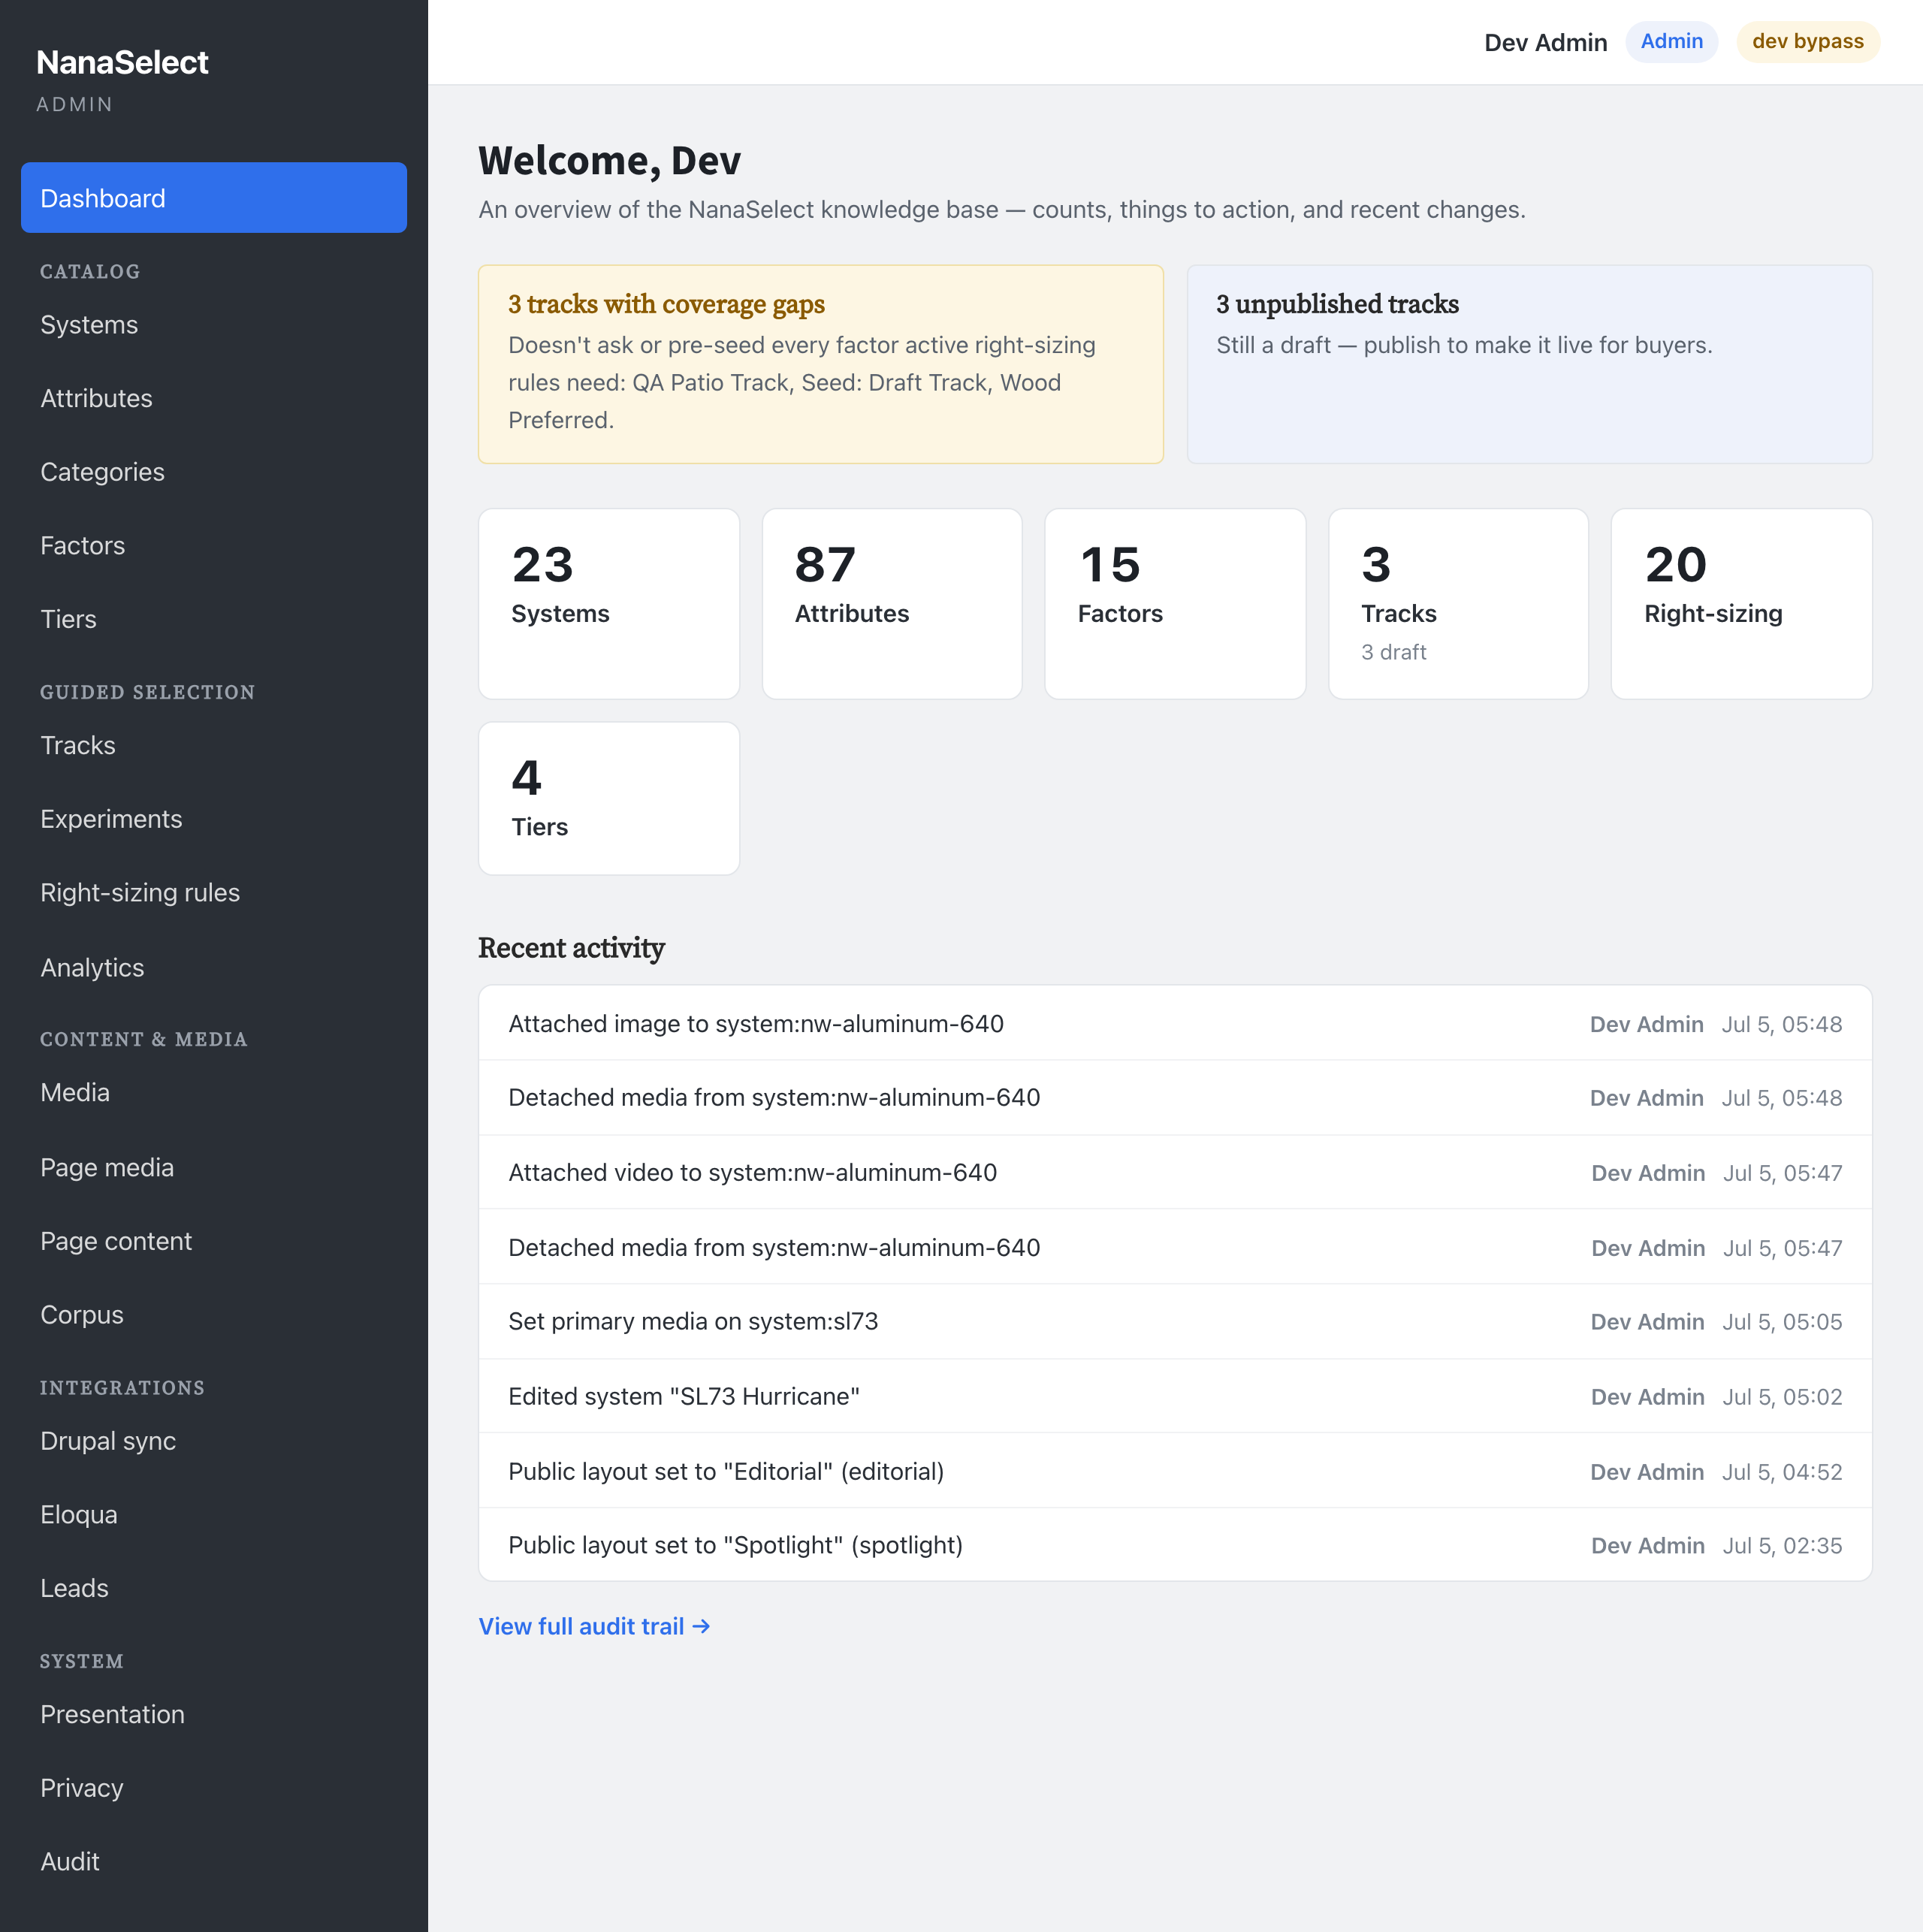
The left-hand navigation is grouped: Catalog (the products and how they're described), Guided Selection (tracks, factors, rules), and Content & Media. You'll work top-down through Catalog → Guided Selection.
2. Add a system
A system is a NanaWall product you might recommend. Open Systems from the sidebar to see the catalogue.
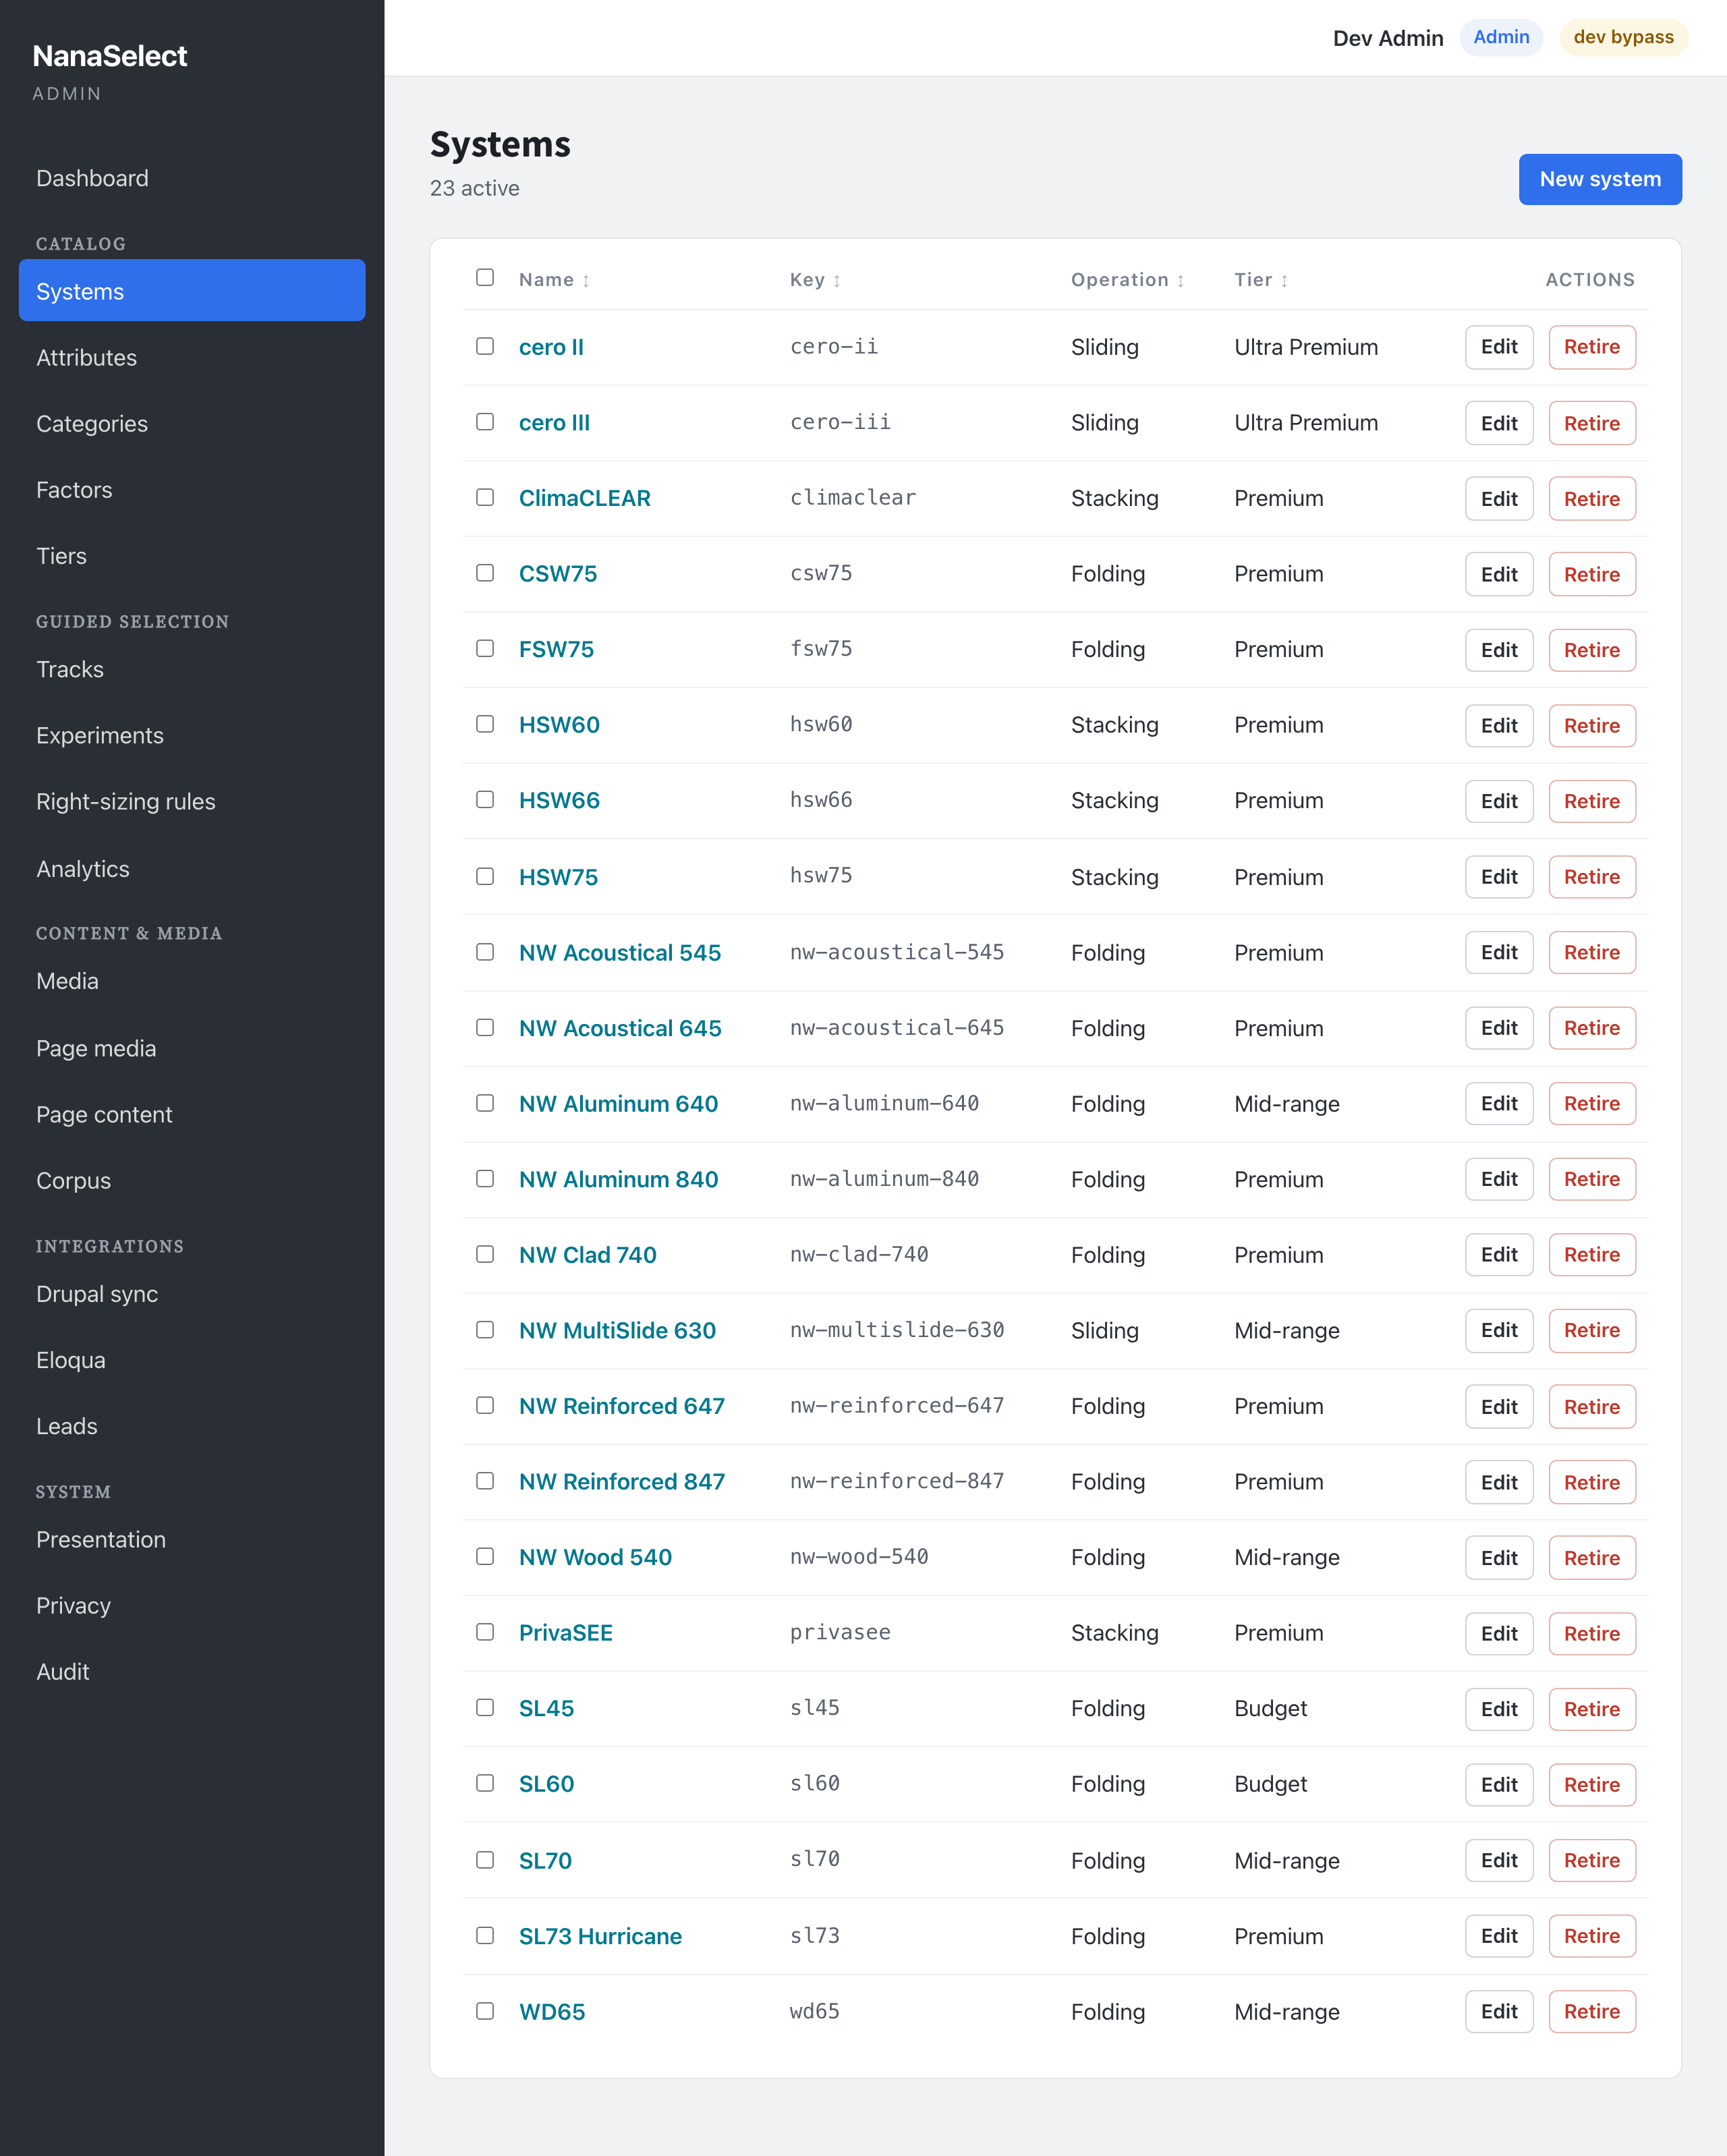
Click New system to open the inline create form.
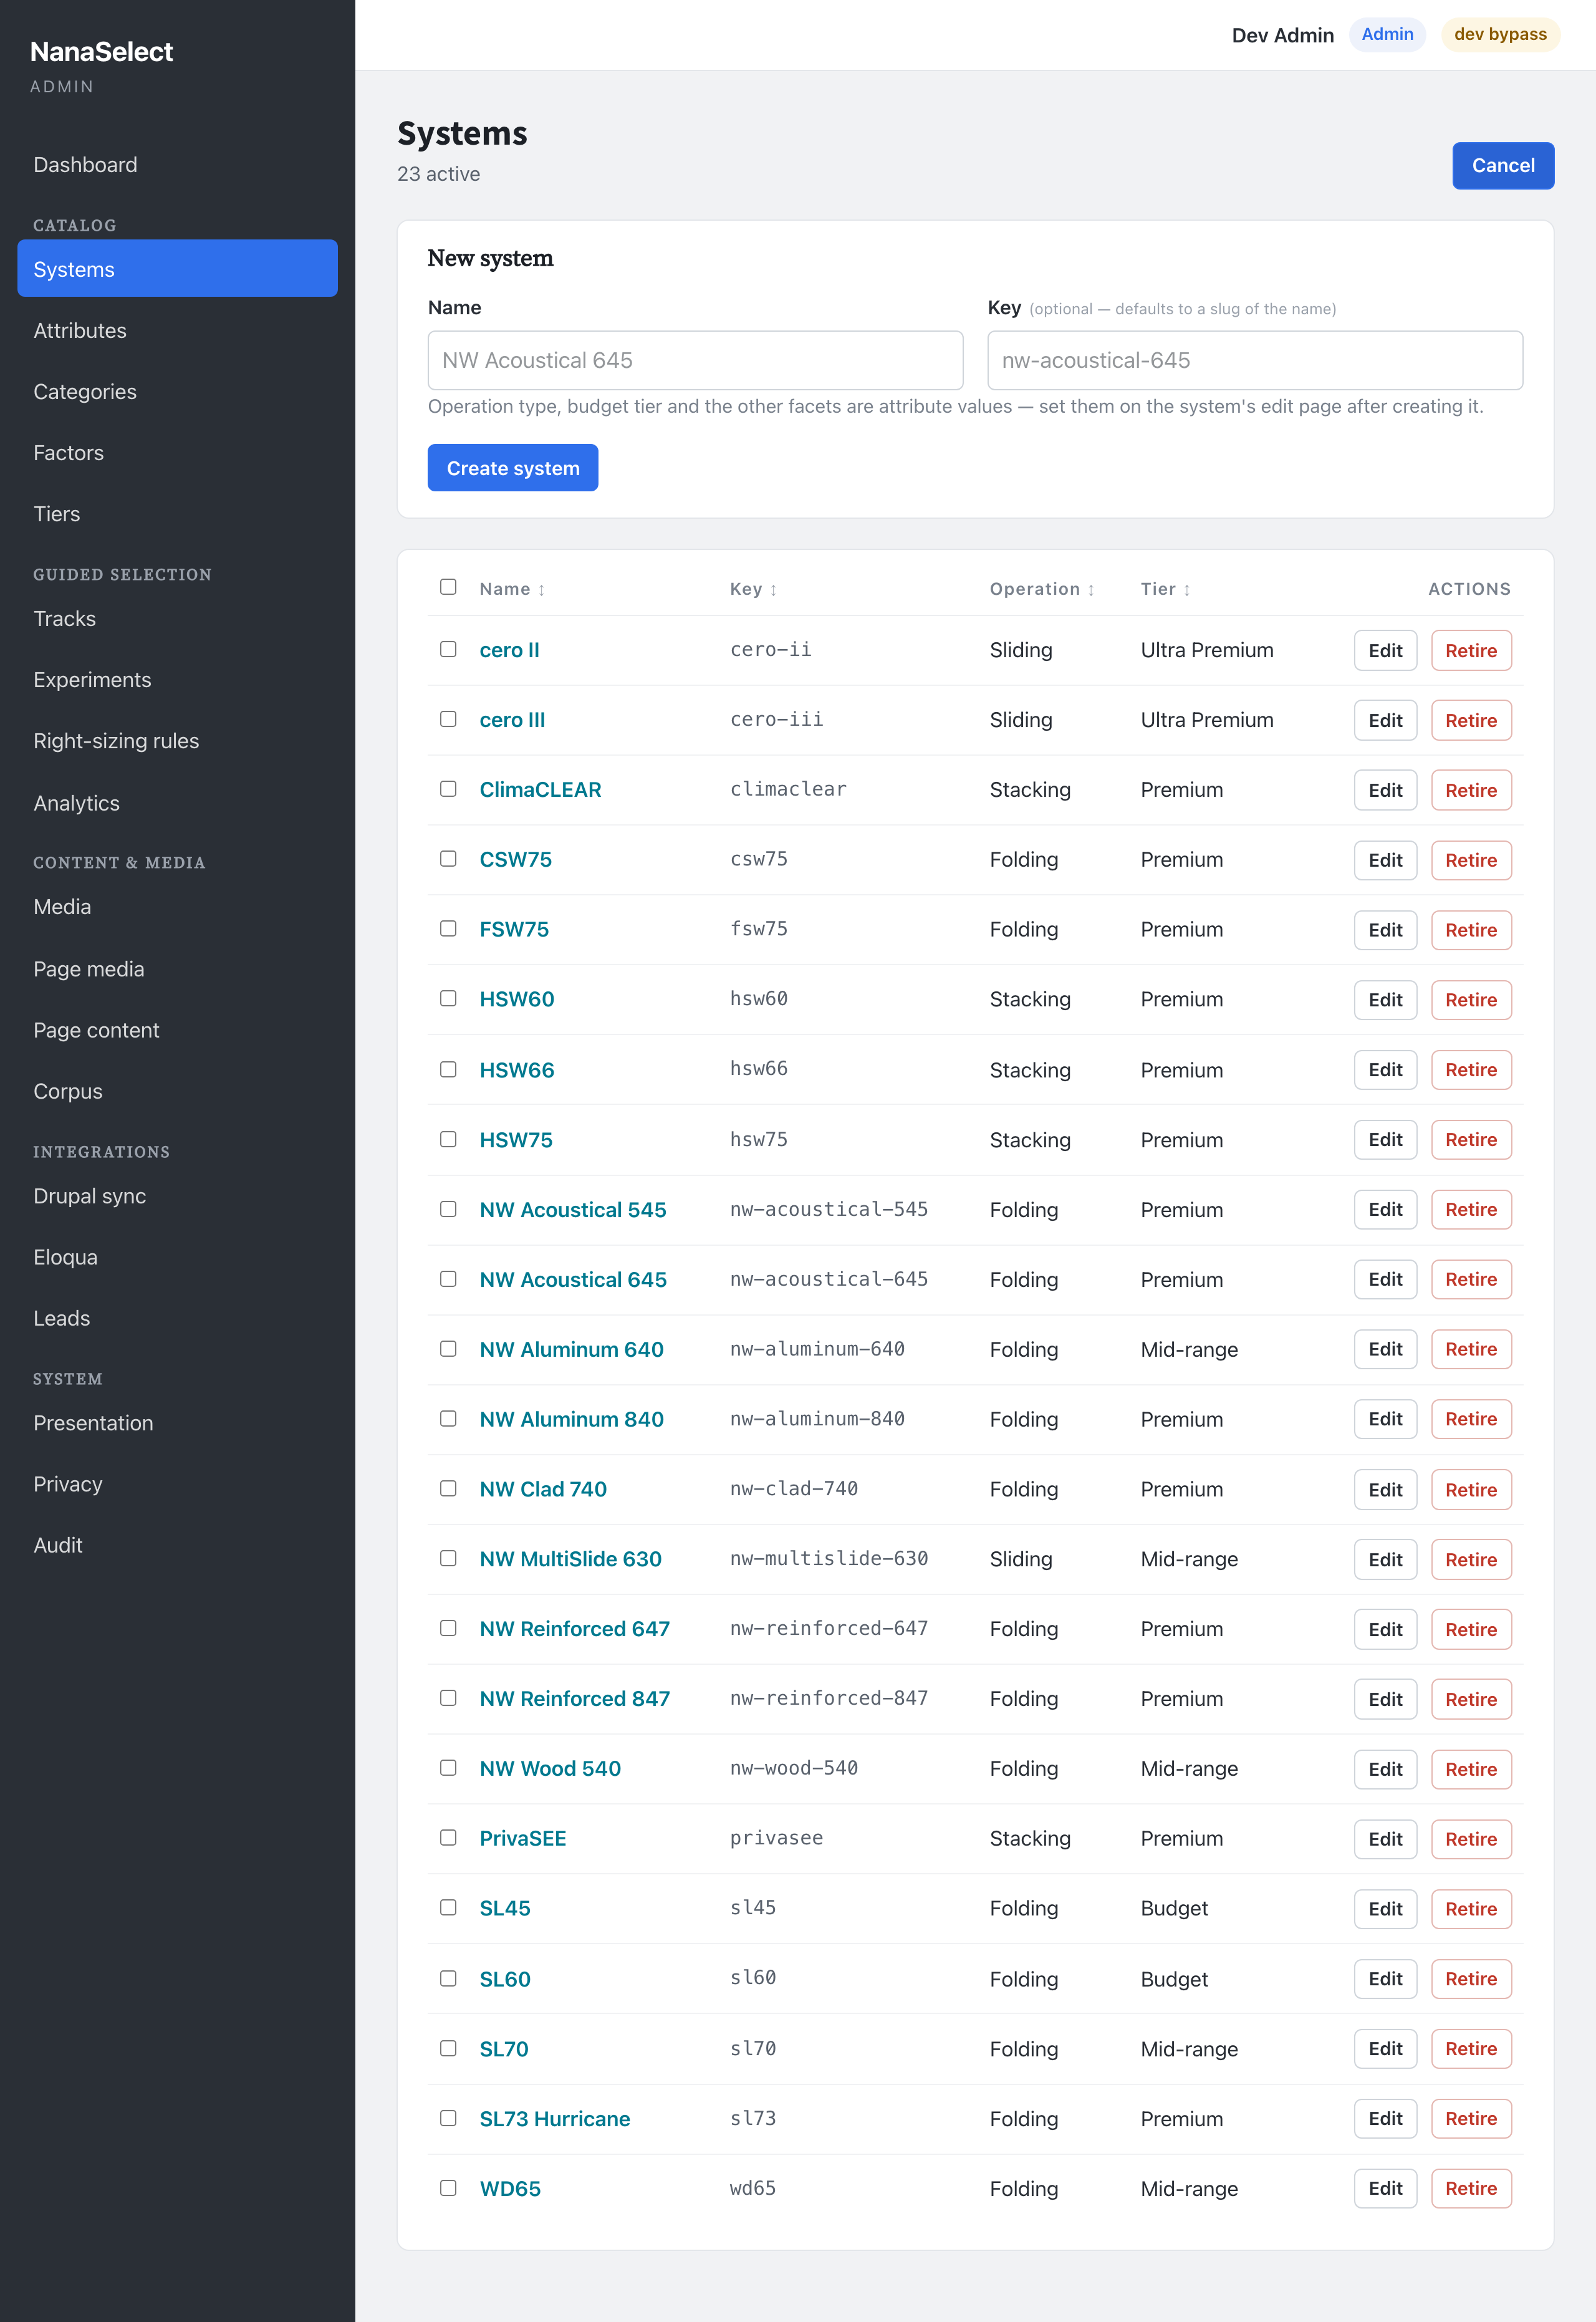
- Enter a Name (e.g. NW Acoustical 645).
- Leave Key blank to derive it from the name, or set your own slug.
- Click Create system.
The system's facets — operation type, budget tier, performance ratings — are attribute values, which you set on the system's Edit page after creating it (there's a hint on the form reminding you of this). That's the next concept.
3. Understand attributes
Attributes are the vocabulary that describes systems: operation type, budget tier, sound rating, wind load, and so on. Open Attributes to see them.
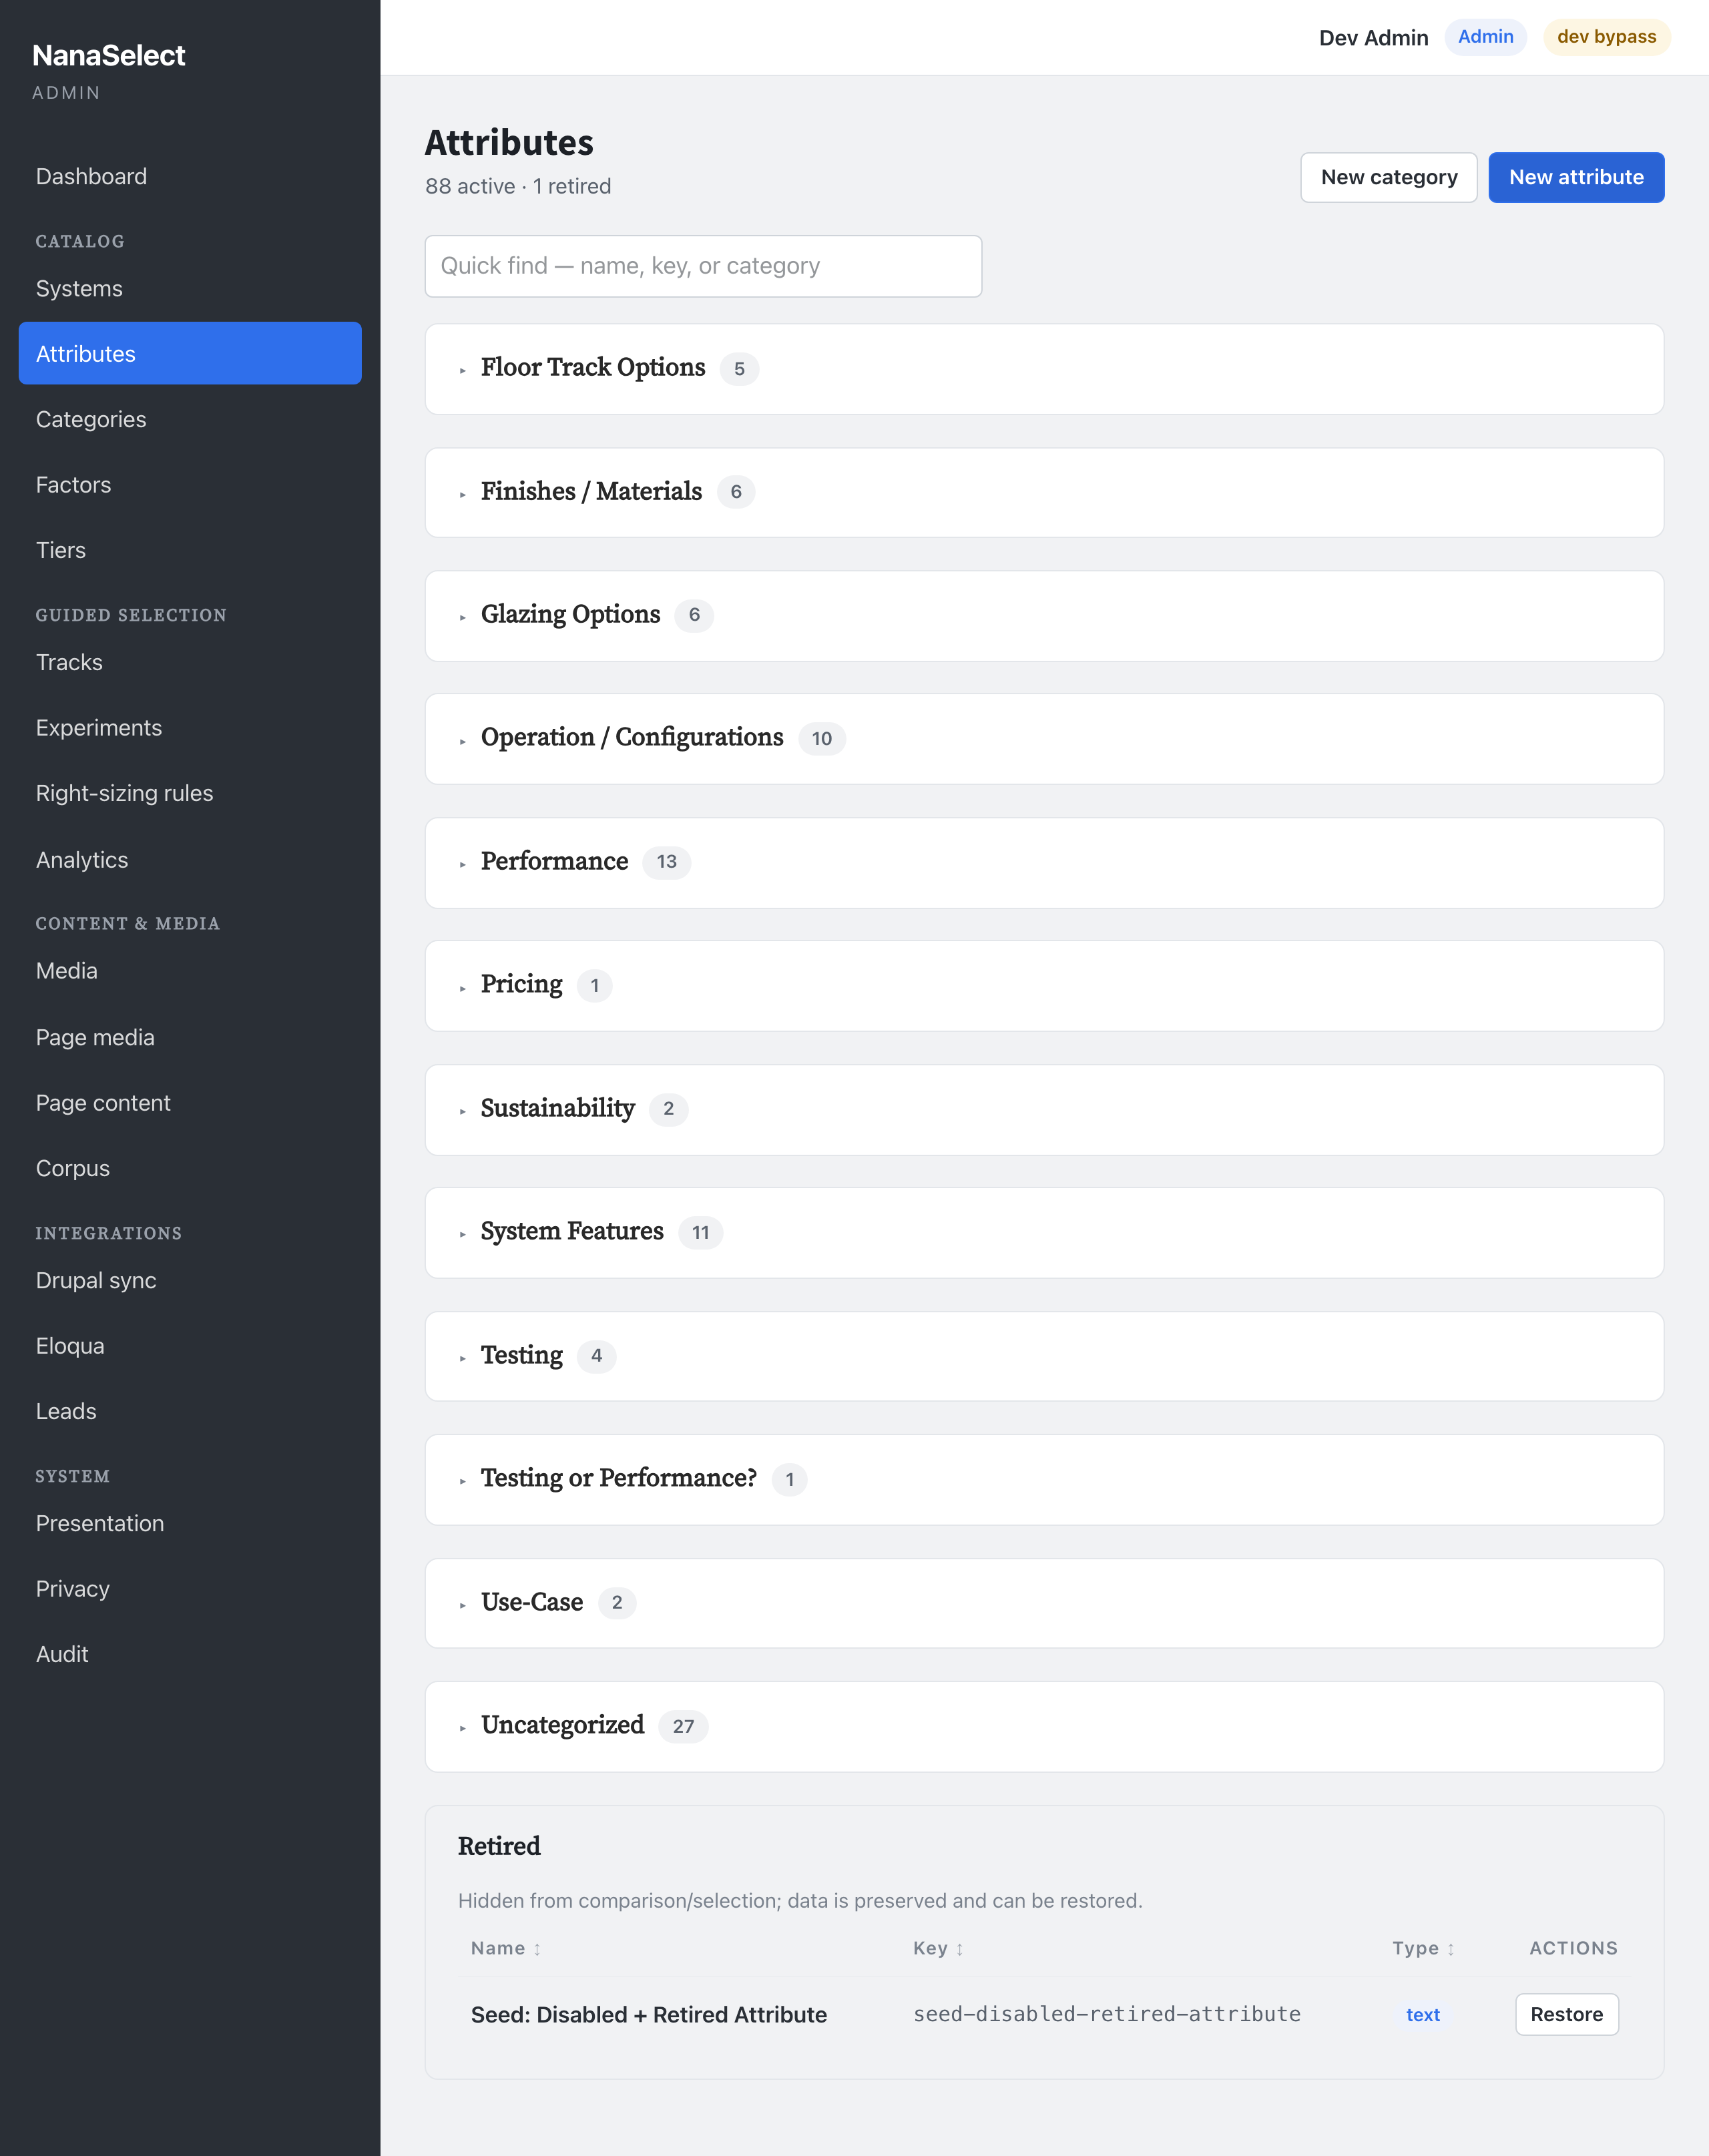
You don't need to create attributes to build your first track — the seed data ships a full set. Just know that when you edit a system, the dropdowns you fill in are these attributes. For managing them in depth, see managing attributes.
4. Create the factors visitors answer
A factor is a question you ask the visitor — "How much sound control do you need?", "What's your budget?". Their answers drive the recommendation. Open Factors.
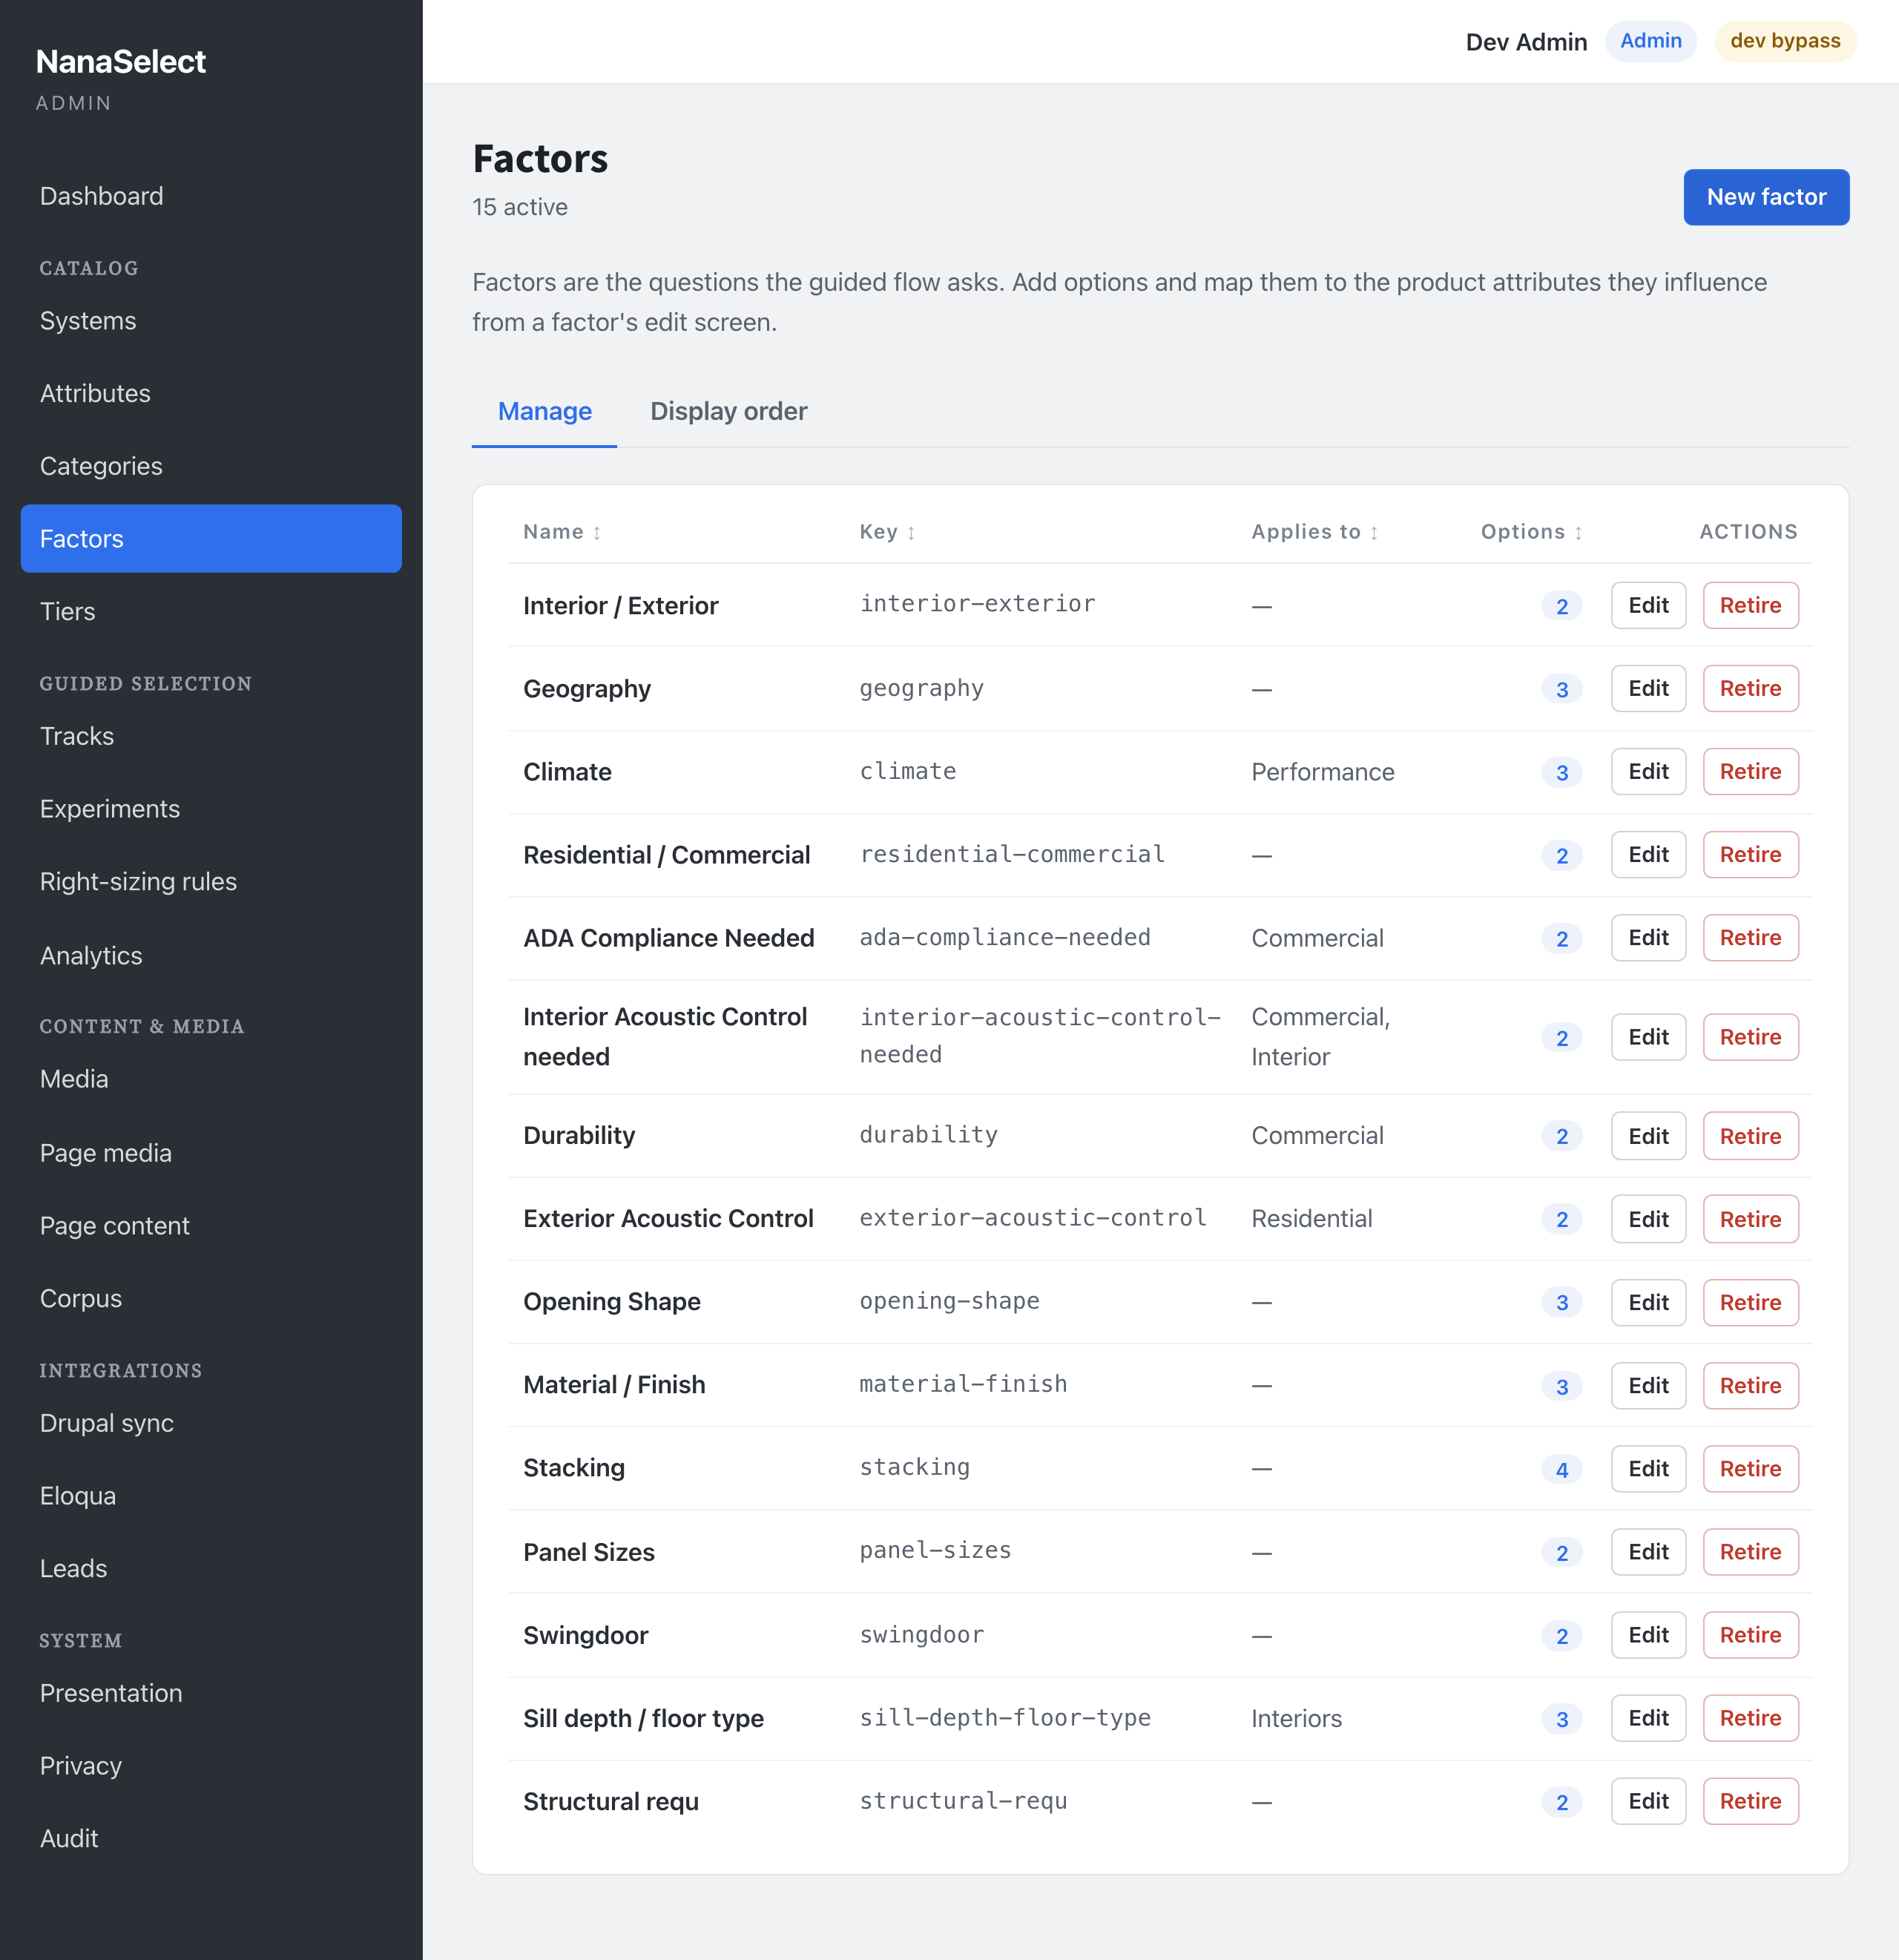
Each factor has a set of possible answers. To add or edit one, use New factor and follow managing factors. For your first track you can reuse the seeded factors.
5. Write the right-sizing rules
Right-sizing rules connect factor answers to systems and tiers — they're the logic that says "this answer points to these systems." Open Right-sizing rules.
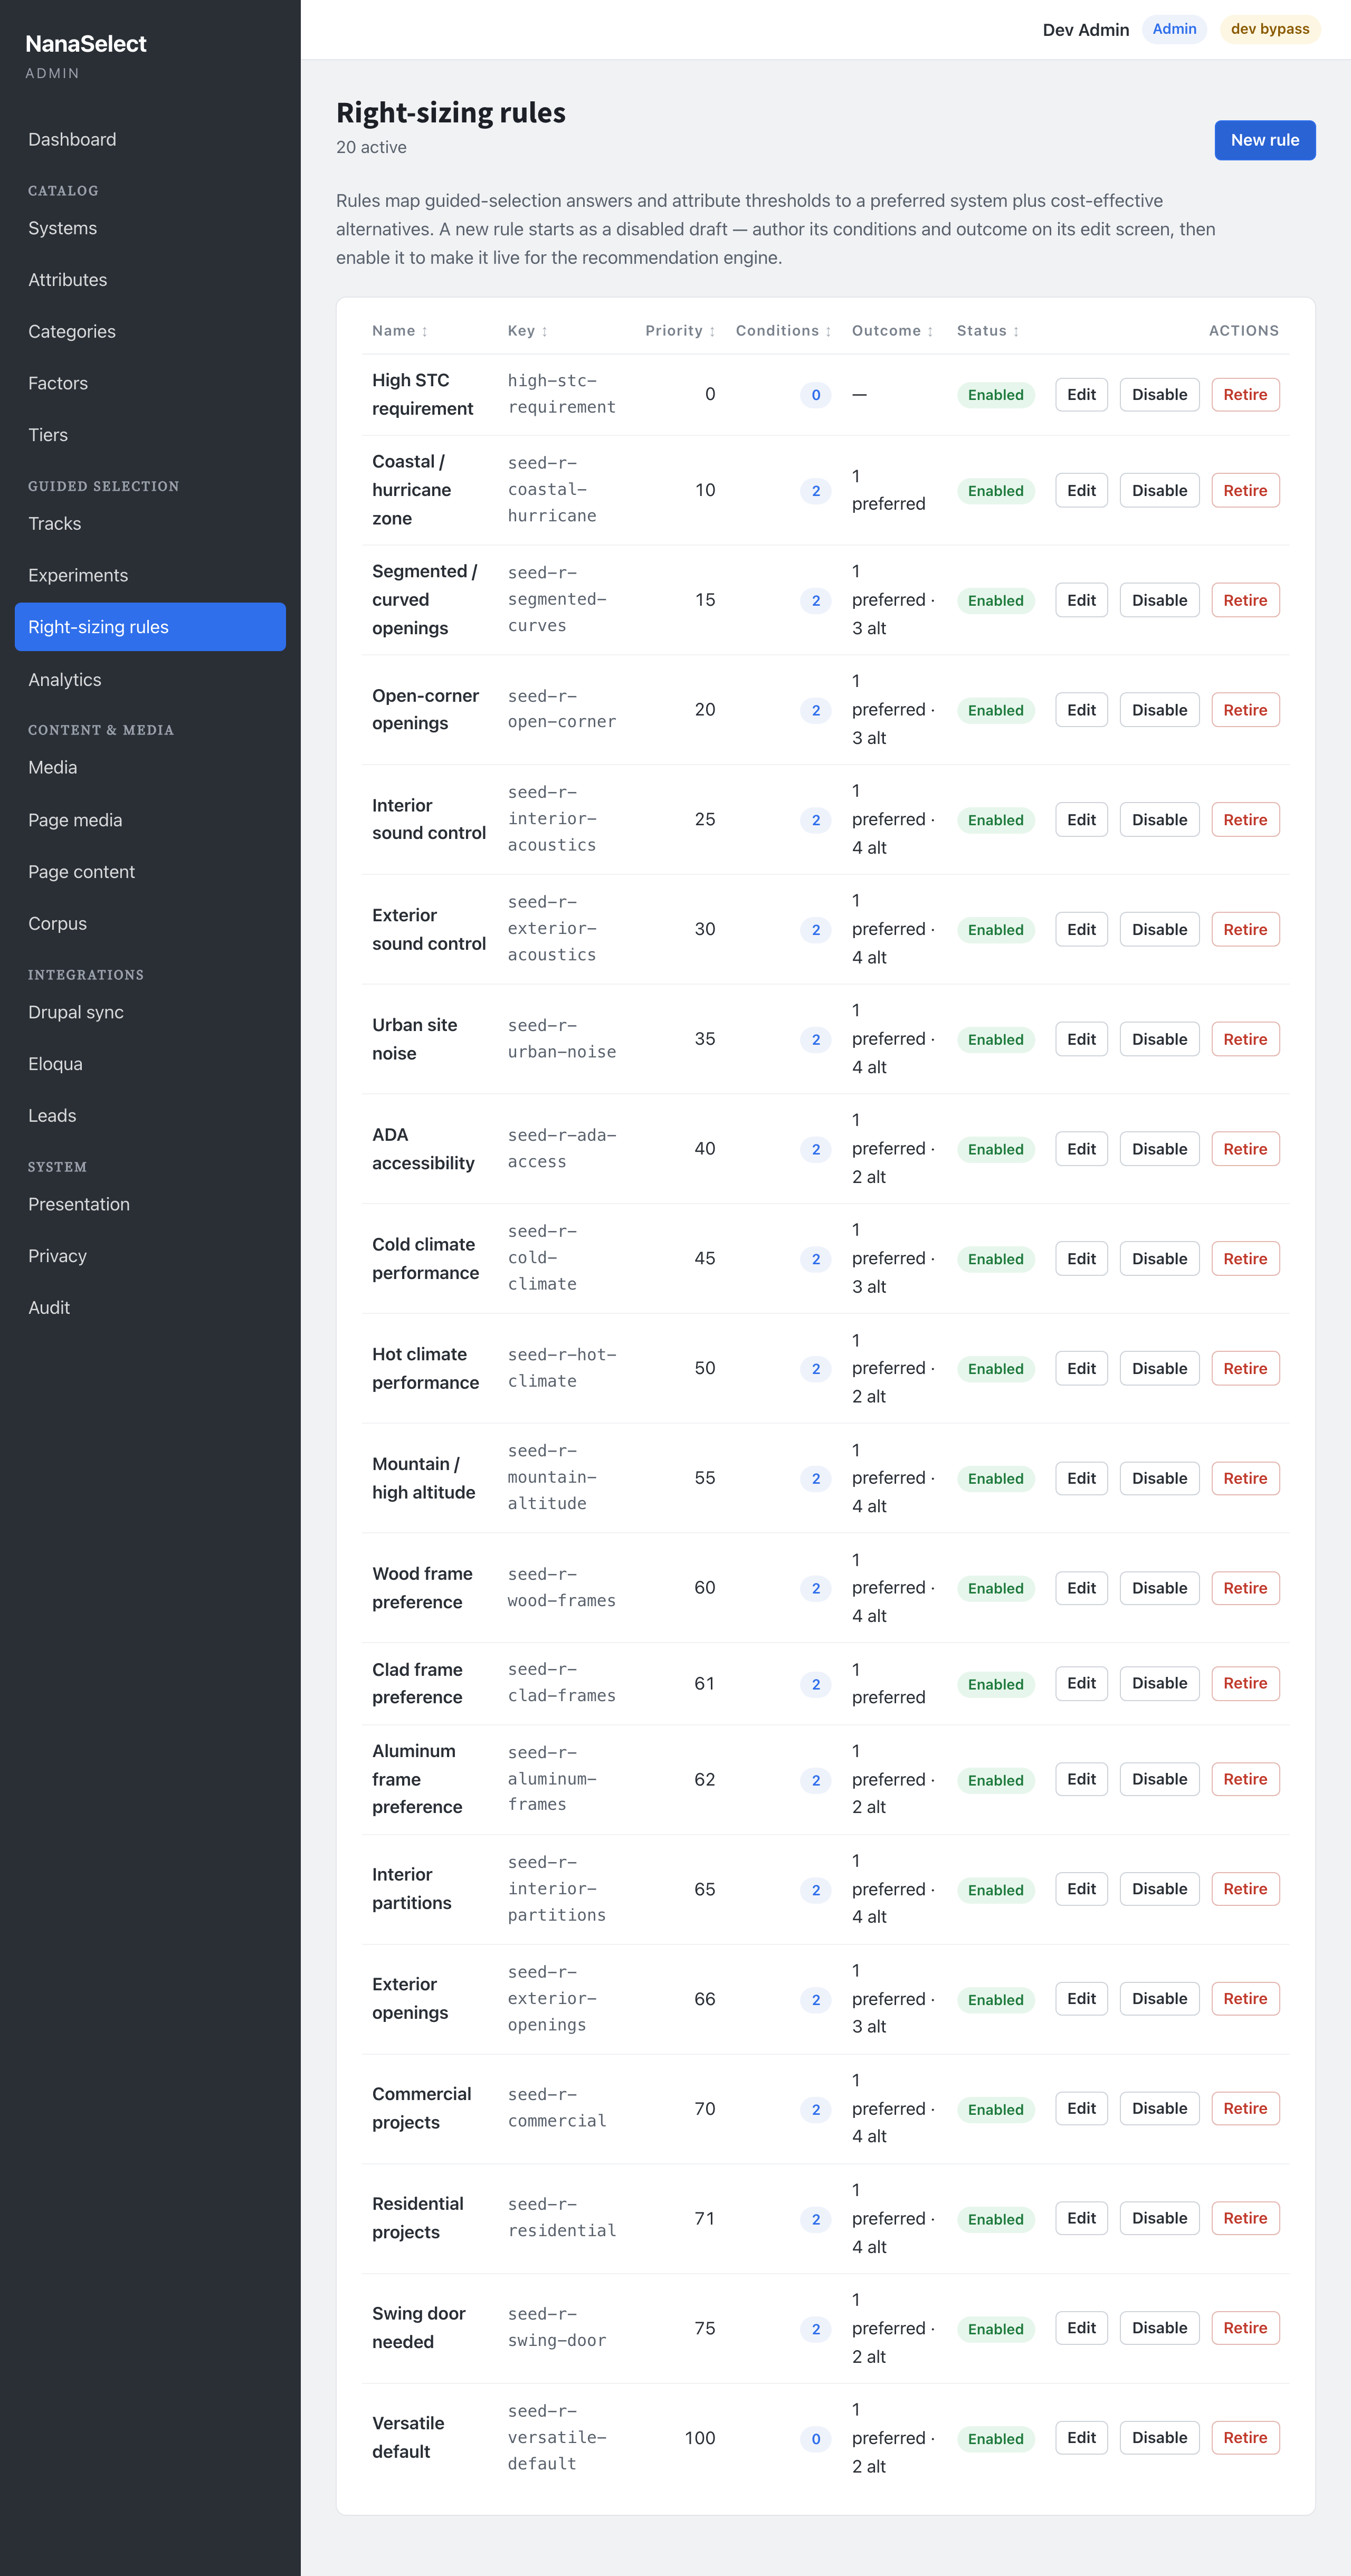
A rule references one or more factors. That reference matters in the next step: a track should ask (or pre-seed) every factor its active rules depend on, or those rules can never fire. The admin flags that for you as a coverage gap. See managing rules for the full rule model.
6. Assemble the track
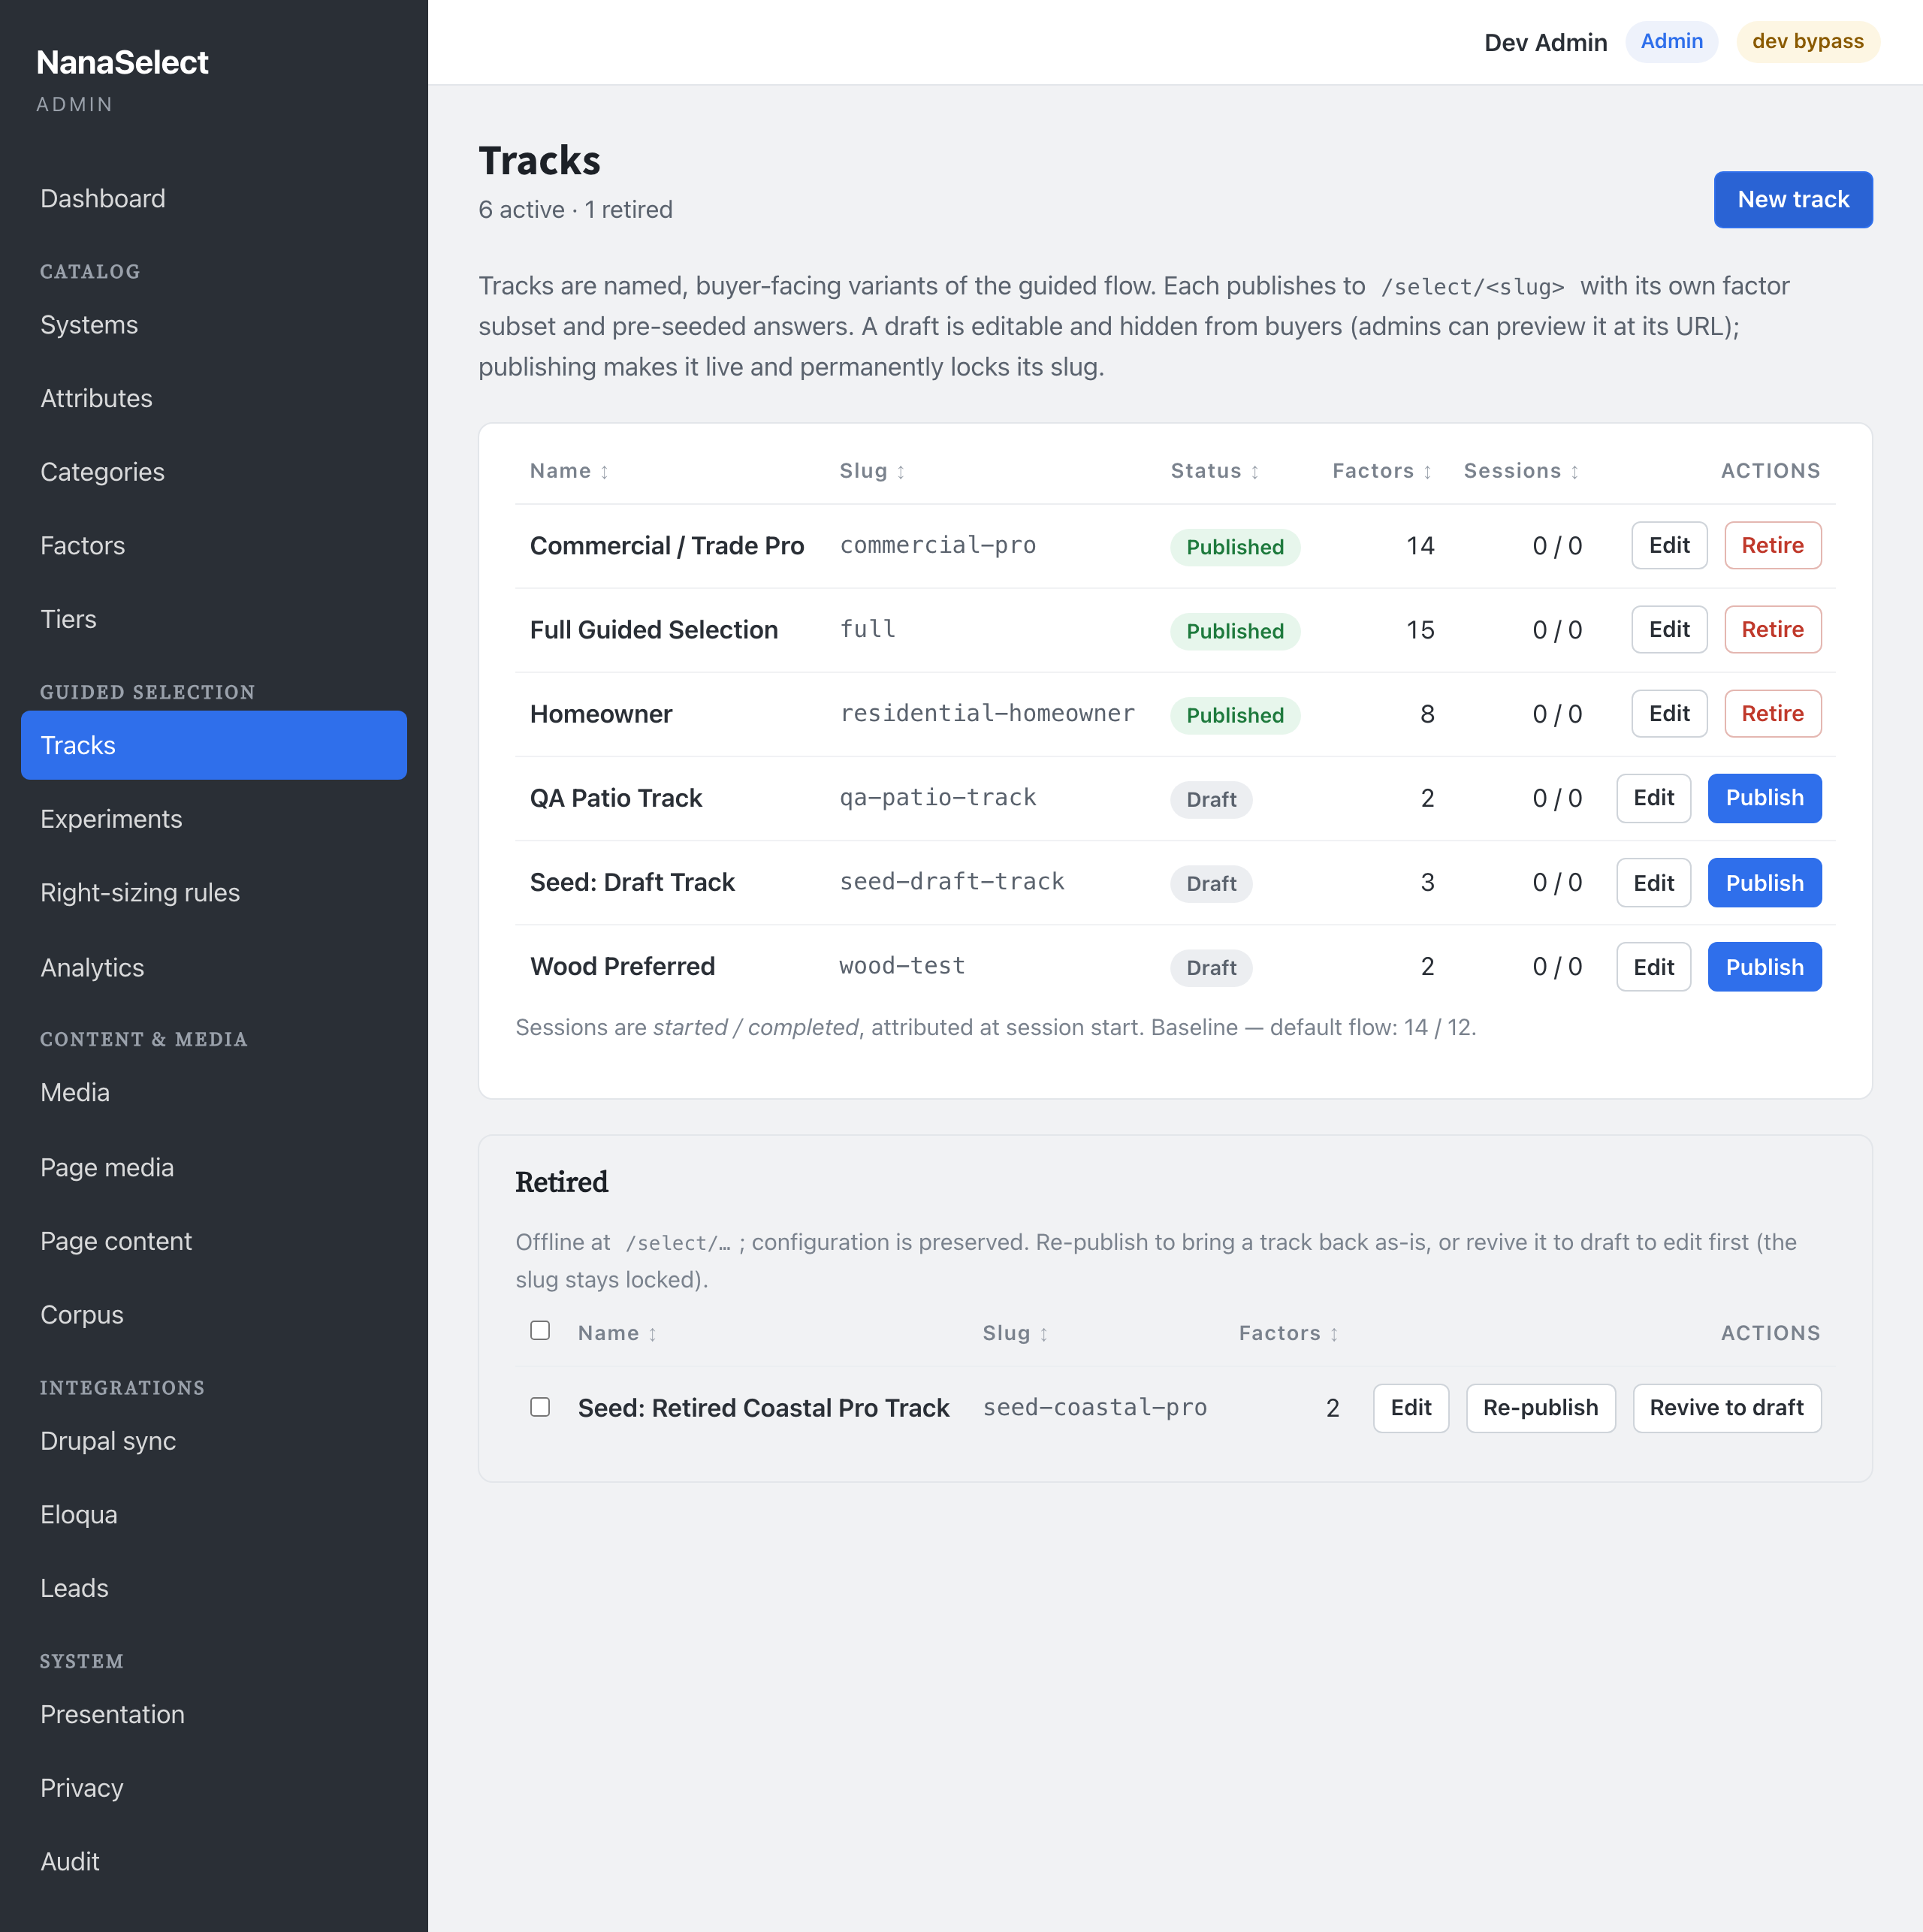
Now build the path itself. Open Tracks and click New track.
Give the track a Name and click Create draft track. It starts life as a draft — safe to configure, not yet visible to buyers.
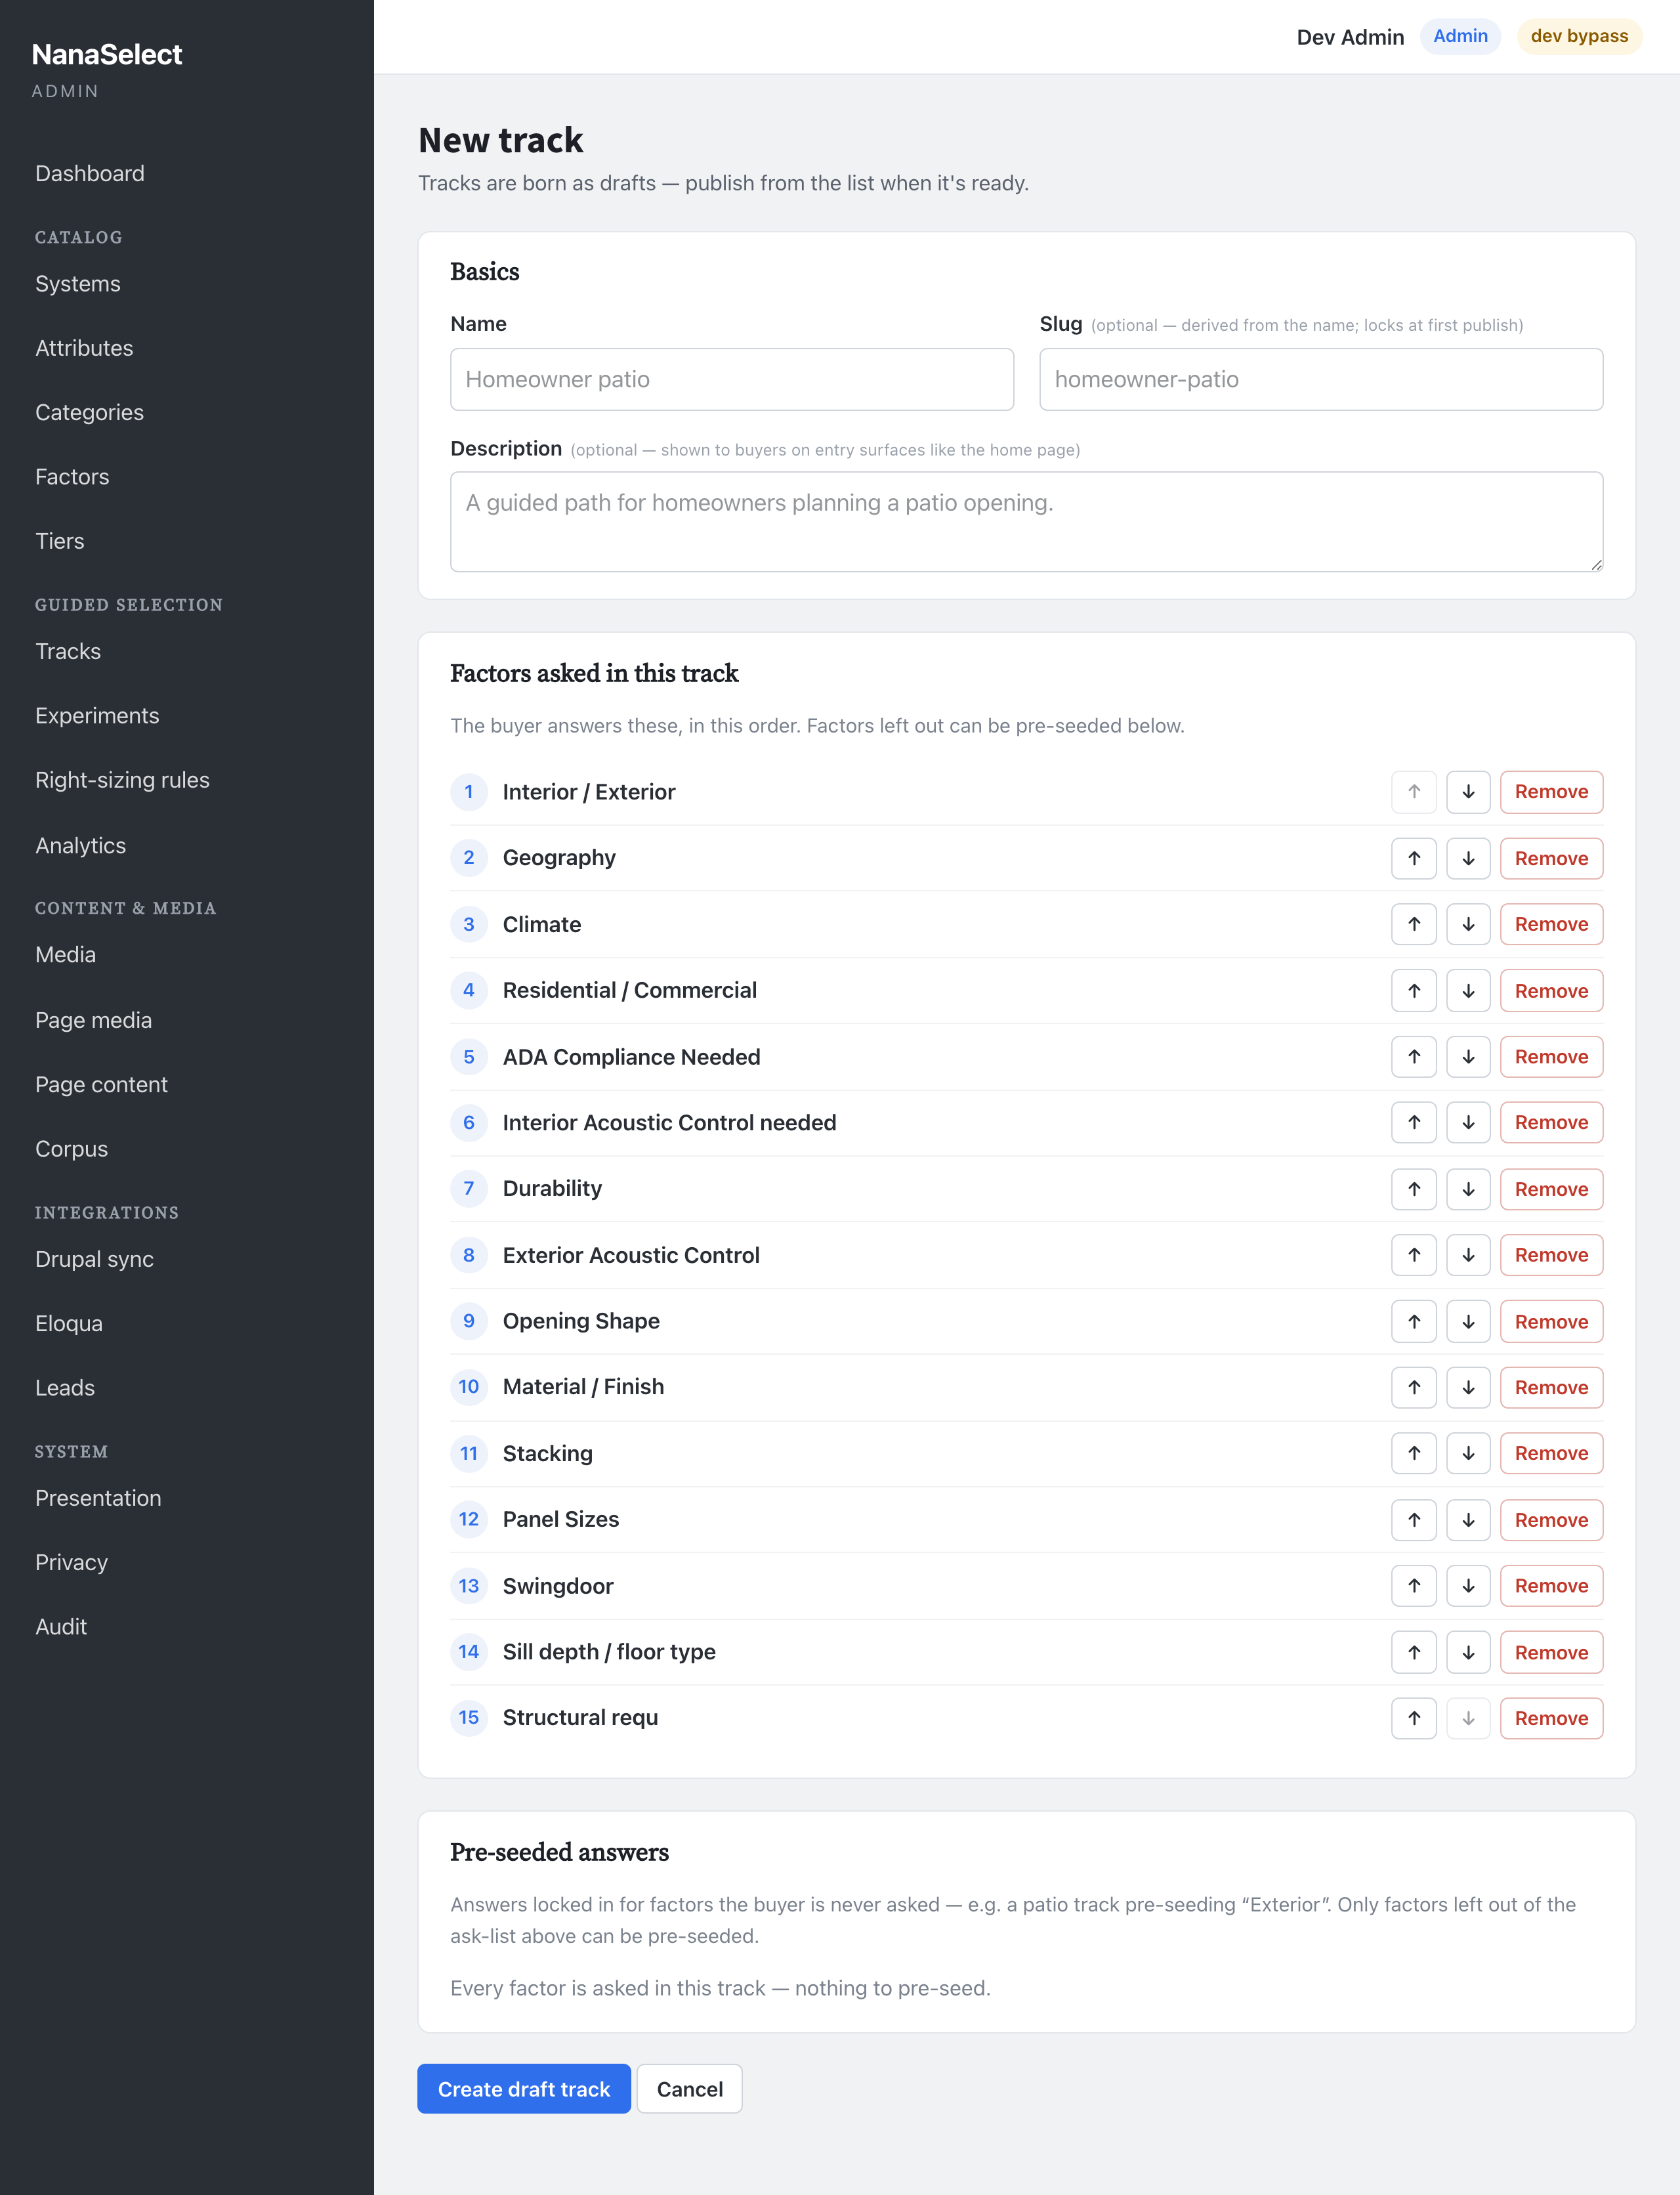
On the track's page you'll see two tabs:
- Details — the name and slug (the slug locks once you first publish).
- Factors — the ask-list: tick the factors this track asks the visitor. Tick every factor your right-sizing rules depend on. If you miss one, a right-sizing coverage gap warning appears telling you exactly which factor to add or pre-seed — publishing is still allowed, but the gapped rules won't fire until you close it.
Click Save changes (one save covers both tabs).
7. Publish it — make it live
Go back to Tracks. Your draft has a Publish button on its row. Click it.
- If the track has a coverage gap, you'll be asked to confirm — "Publish … with a right-sizing coverage gap?" — with a Publish anyway option. Close the gap first if you can; otherwise publishing is still allowed.
- Once published, the status flips to Published and the track exposes a live buyer URL at
/select/<slug>that you can copy and share.
8. See it live
Open the guided selection flow at http://localhost:6650/select (or the track's own /select/<slug>). This is exactly what a buyer sees — answer the factors and watch it right-size to a recommendation.
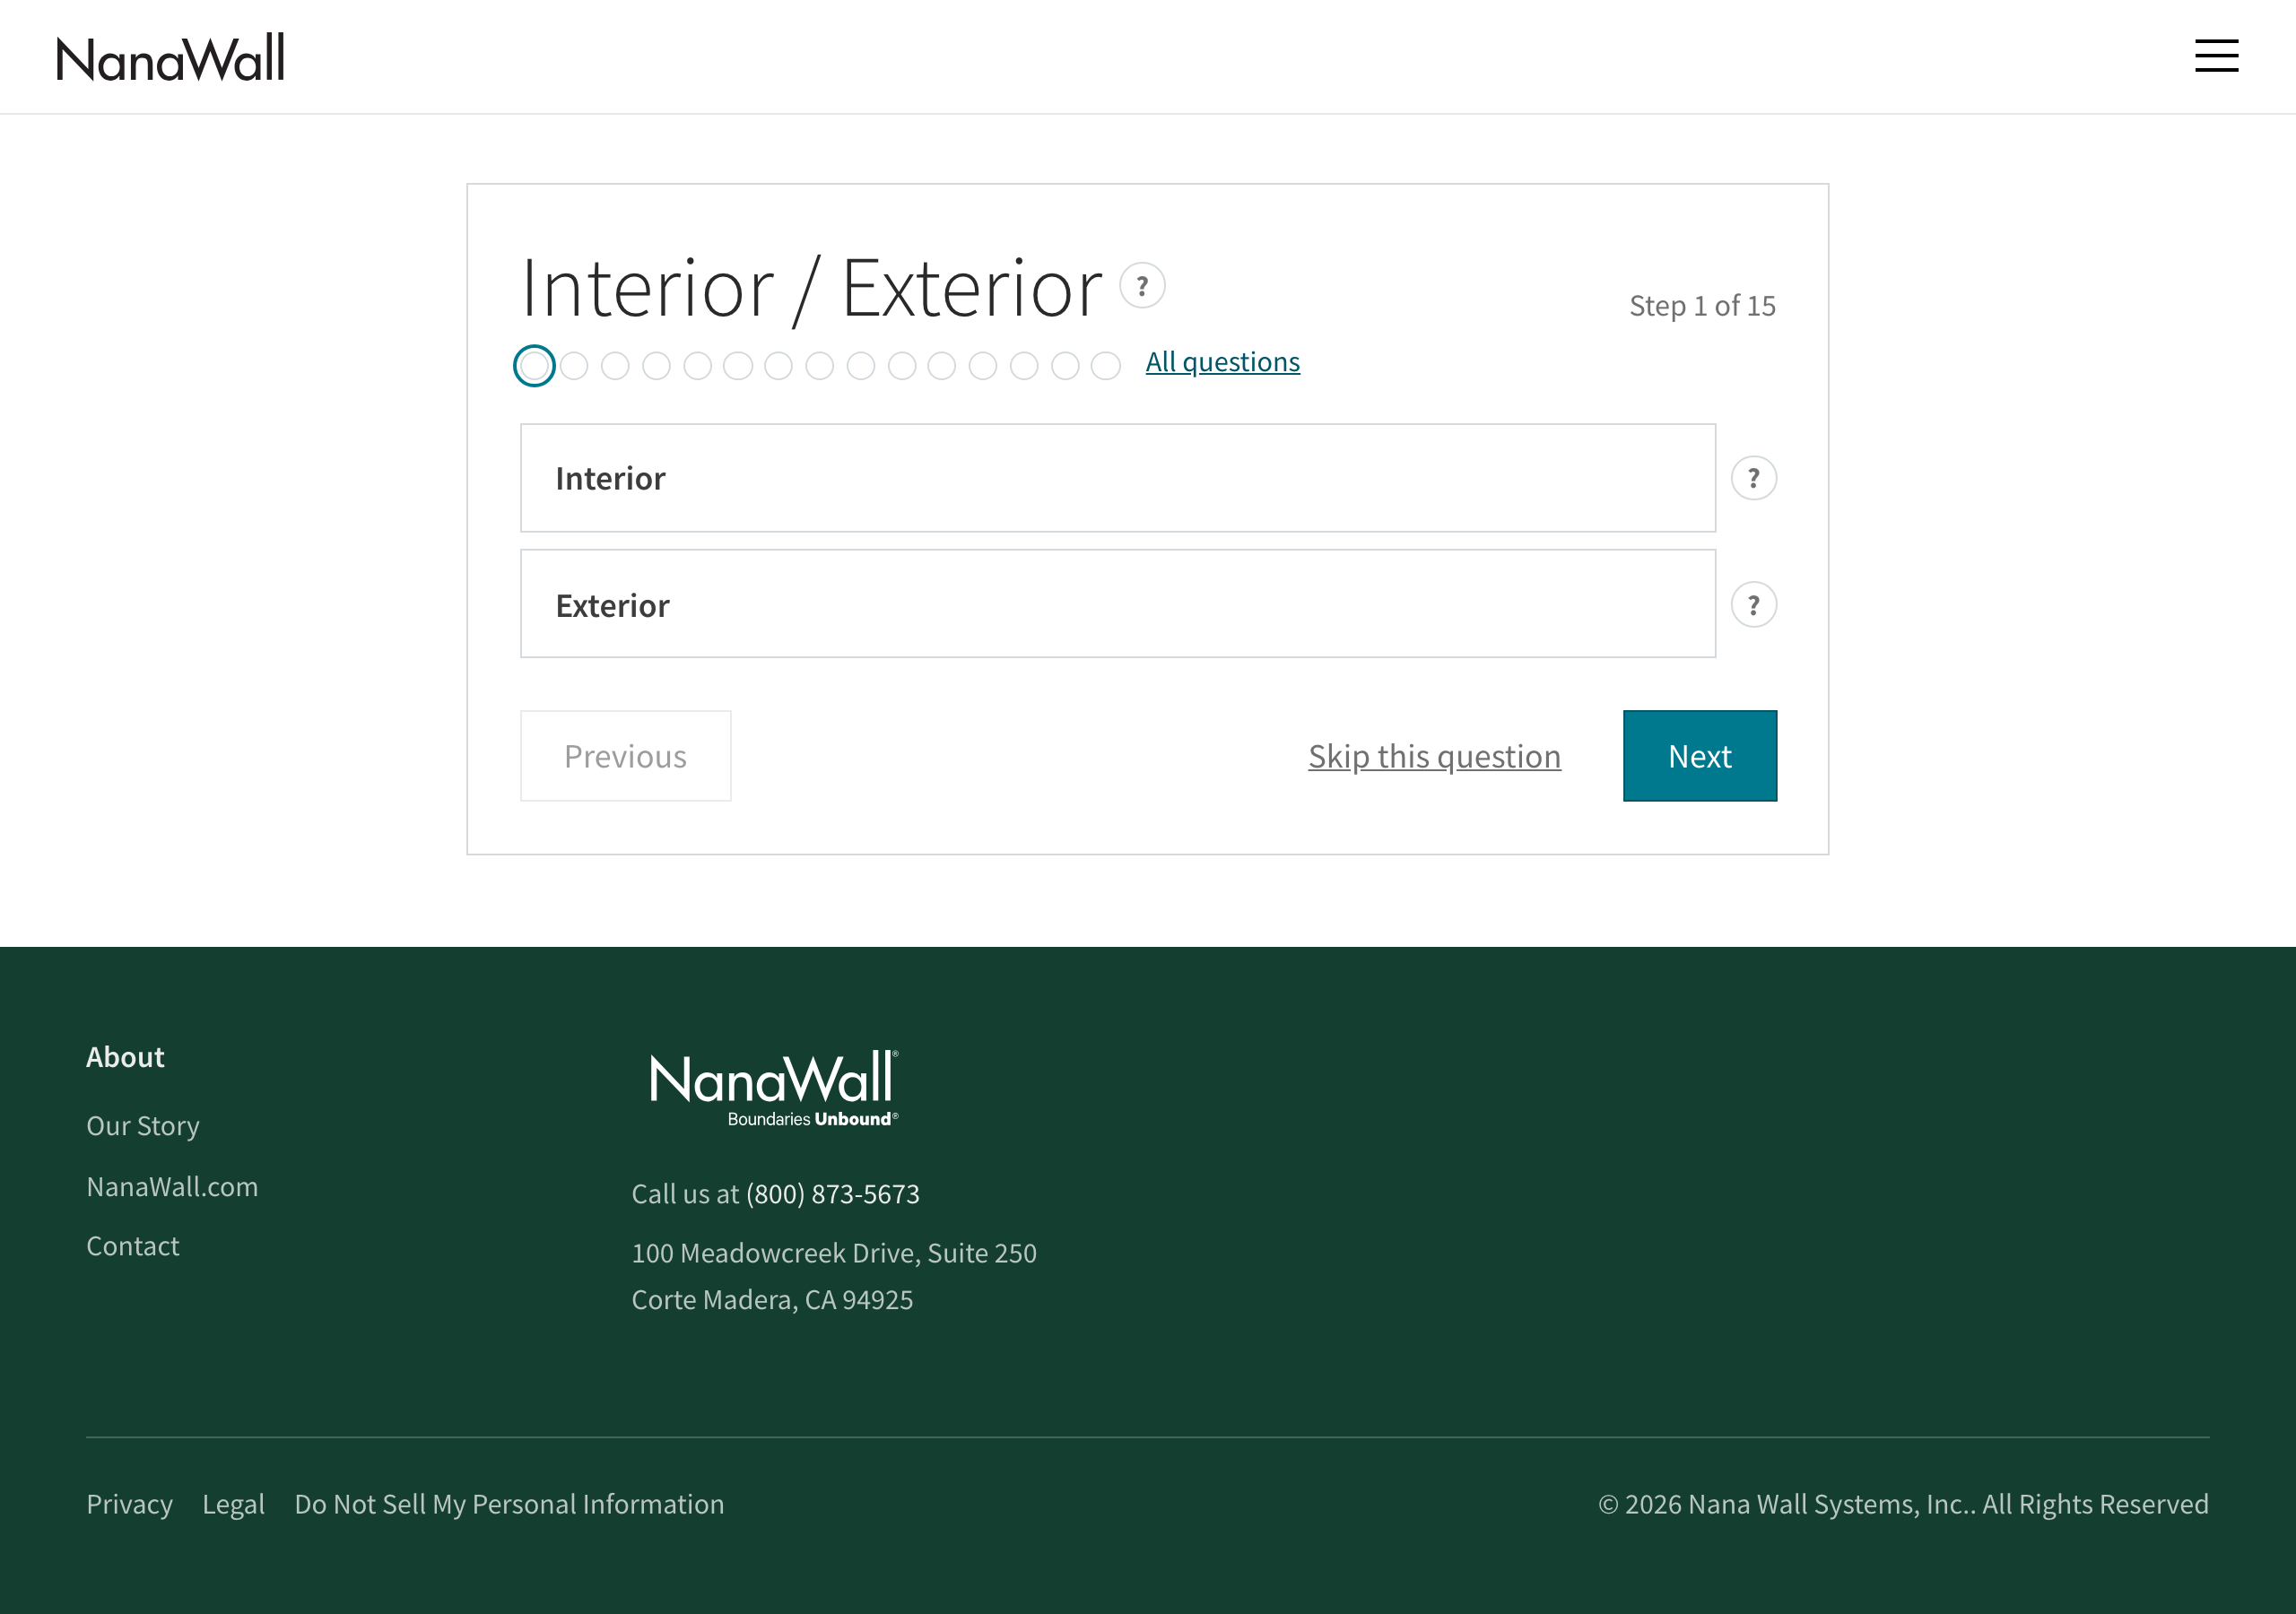
That's a complete track: systems described by attributes, factors that ask the right questions, right-sizing rules that turn answers into recommendations, and a published path a buyer can use.
Refreshing these screenshots
The screenshots above are generated by a committed script, so they can be refreshed whenever the admin UI changes:
sh
dev-up                  # ensure the local app is running and seeded
pnpm docs:screenshots   # re-capture into docs/getting-started/images/first-track/
The script (scripts/docs-screenshots/capture-first-track.mjs) drives each screen with Playwright and writes one PNG per step. If a screen moves, update the step's path in that script.
Where to go next
- How-to guides — deeper, task-by-task coverage of every admin surface you touched above.
- Deployment & handover — taking NanaSelect from local to a live deployment.
- Why it works — the reasoning behind guided selection.